REPAIRS TO REAR BLINDS
The rear blind of the saloon is made of artificial silk,
real silk water proof fabric, or Holland. Artificial silk is the material
chiefly used. It is made in various colours to match the upholstery and is 27
in. wide. The blind (Figs. 1 to 6) is made up on a spring-mounted wooden or
metal roller and rolls up either at the top or bottom of the window. The
last-named type is shown in Fig. 1. The roller is mounted in end brackets and
the leading edge of the blind has a lath inserted in a hem at the centre of
which is fastened a screw eye which takes the operating cord. This extends along
the roof on the off-side to a convenient position in front where the blind may
be controlled from above the driver's seat.
Removing the Blind
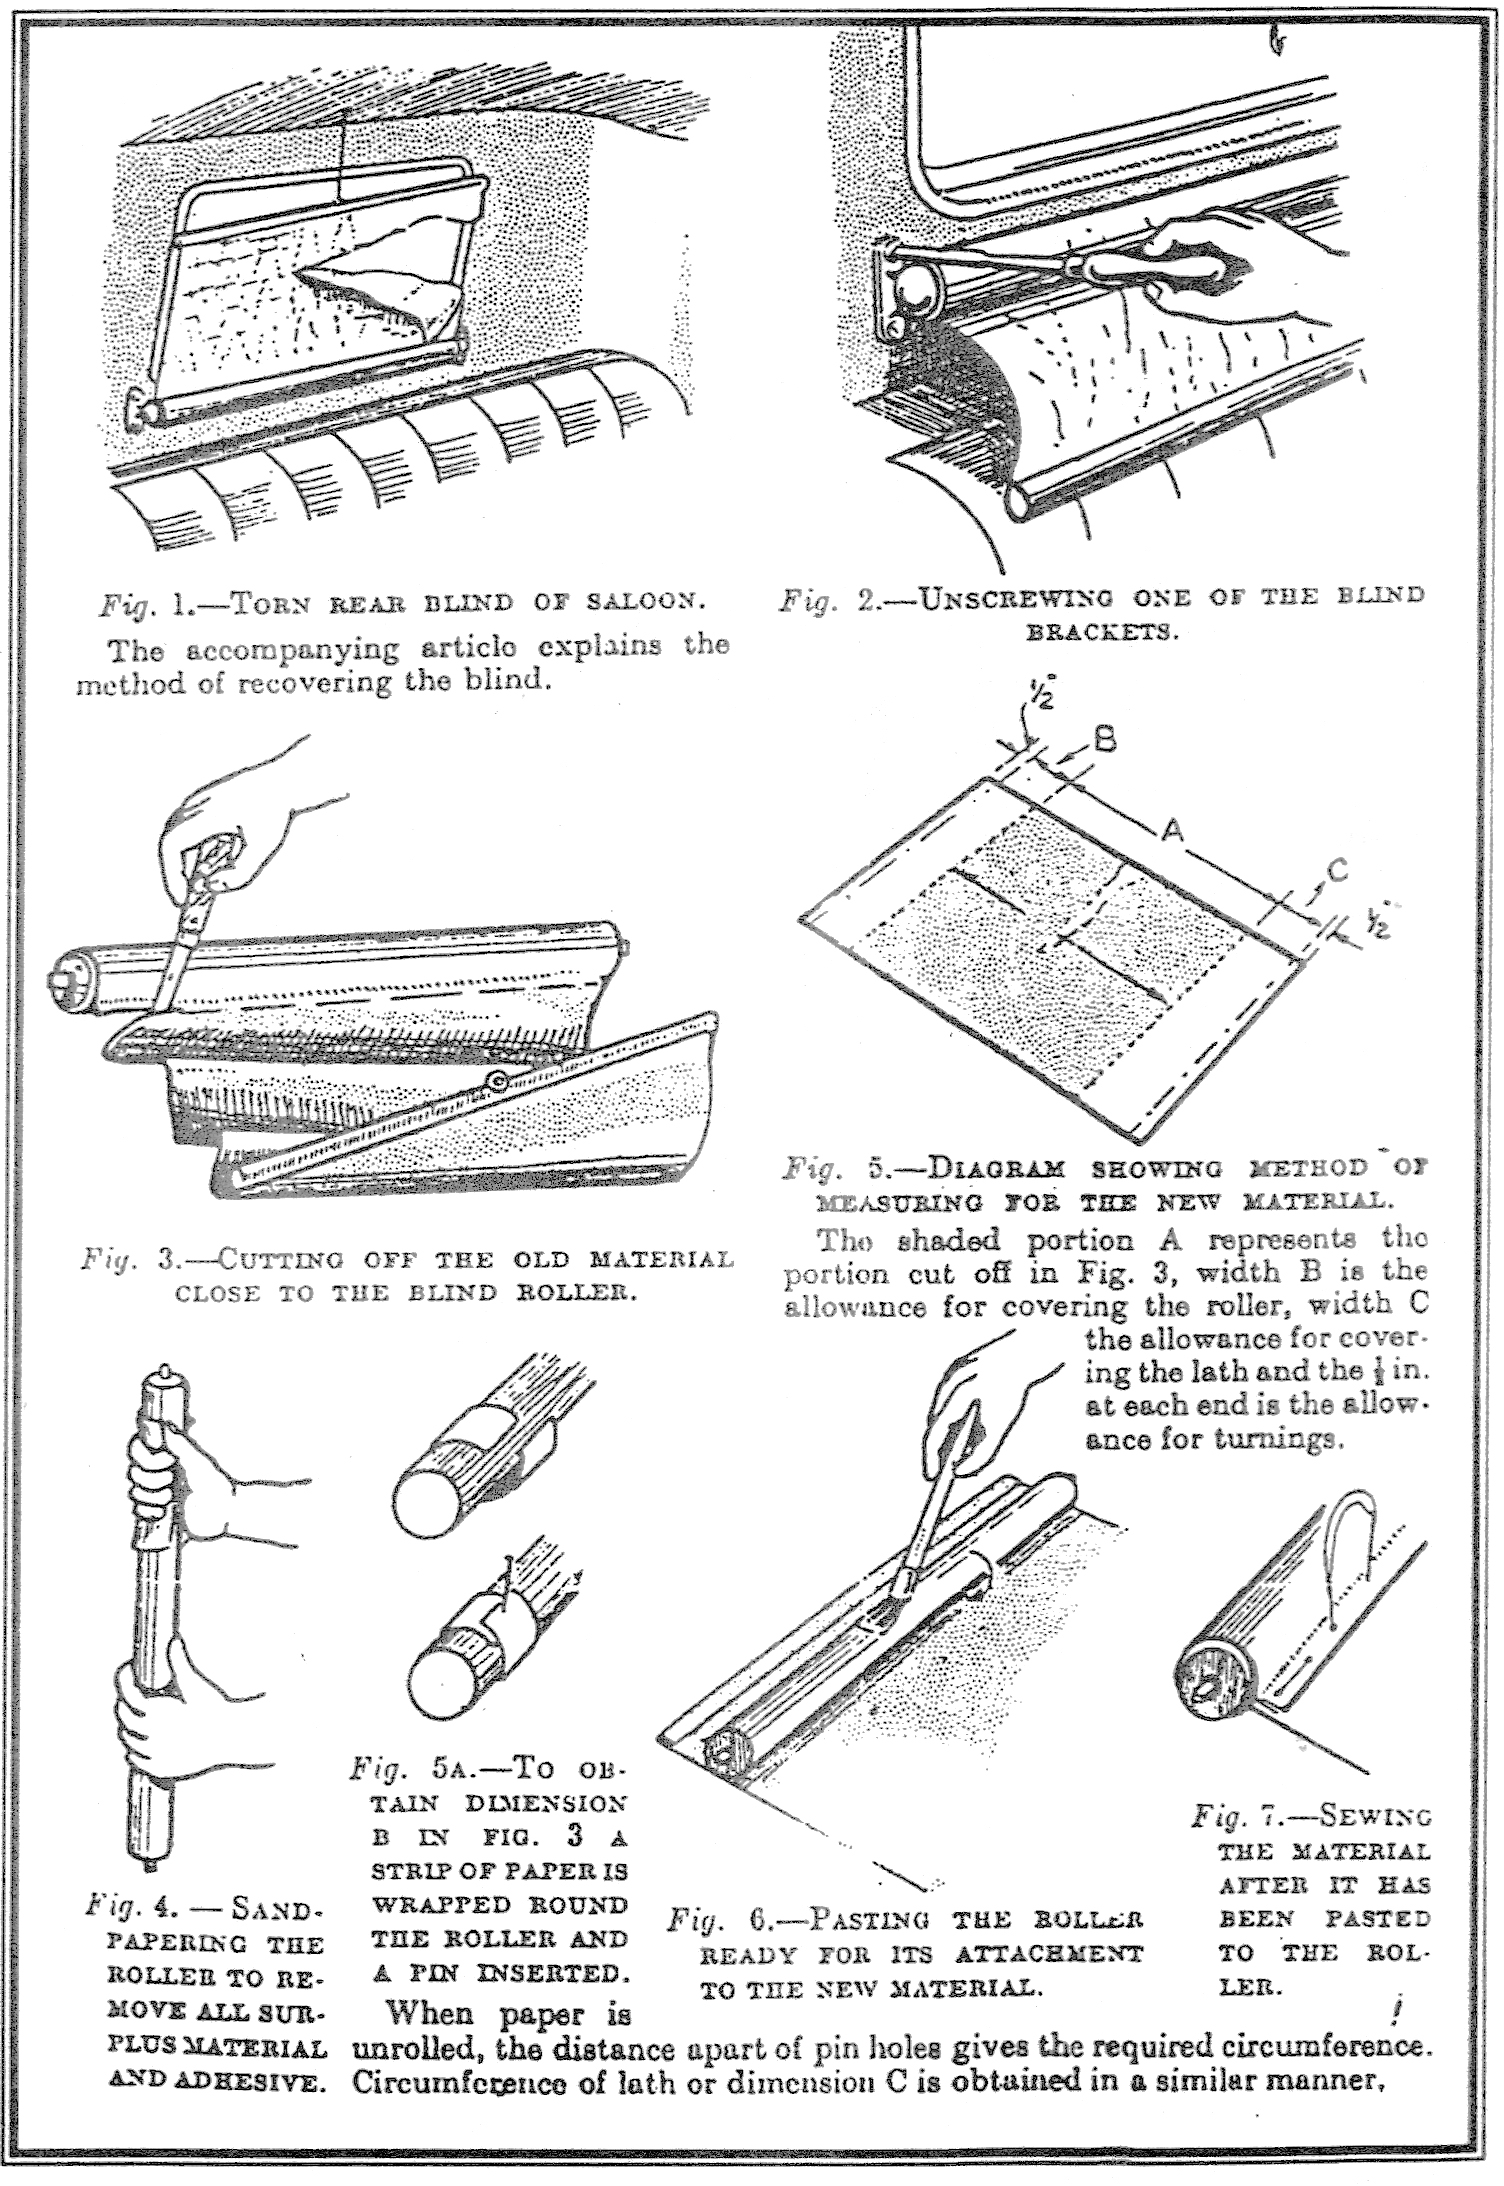
The torn blind, shown in Fig. 1, is to be recovered. If the blind does not lift
out of one of its end brackets, then the brackets are unscrewed (Fig. 2), Untie
the knot of the operating cord from the centre screw eye. The blind having been
released from the car, its covering is then cut away with a sharp knife close to
the roller as shown in Fig. 3. The material is probably pasted to its roller so
that any stuff adhering is removed by sand-papering it (Fig. 4). Remove the
screw eye and lath from the end of the blind.
Measuring the Blind Material
A simple method of measuring for the new blind material is illustrated in Fig.
5. Lay the old blind on a piece of new artificial silk. The old blind less the
amount which has encircled the roller is represented by the shaded portion A.
Lengths B and C represent the allowance for covering the roller and lath
respectively while an extra 2 in. each end is allowed for turnings. To ascertain
the length
B cut a strip of paper and wrap it round the roller and then insert a pin
through the overlapping joint. When the paper is unrolled, the distance apart of
the pin holes gives the length required. The circumference of lath C is obtained
in a similar manner.
Ensuring Correct Alignment
In order to ensure the smooth operation of the blind the roller must be
horizontal and the blind material a true rectangle. Also, the edge of the stuff
attached to the roller must be parallel to the longitudinal axis of the roller.
Reinstate the uncovered roller in its brackets at the window and test it with a
spirit level. If any rectification is necessary, plug the screw holes at one end
and adjust the position of the bracket and bore fresh holes. To make sure that
the sides and ends of the new piece of material are parallel fold the stuff
lengthwise and crosswise so that the edges meet. If the roller has no guide line
or lengthwise groove in it, then the roller is laid on a flat surface against a
straight piece of wood which is the same thickness throughout and about half the
diameter of the roller so that a guide line may be marked on the roller.
Attaching Blind to Roller
The blind having been cut to size and the ends turned and sewn, the roller is
laid on the material in the position shown in Fig. 6. Paste or glue is now
applied to the roller and then to the end of the material between it and the
roller. When neatly secured, the material is then sewn with a row of stitching
close to the roller as illustrated in Fig. 7. Sew in the lath in a similar
manner, find the centre, punch a hole with a fine bradawl and insert the screw
eye. Do not turn the bradawl in the usual manner because this will pucker the
material. Insert the screw eye, wind the spring of the roller, reinstate the end
brackets and test the operation of the blind by hand. Before finally inserting
the blind clean the brackets and end fittings of the roller and give a spot or
two of fine lubricating oil and wipe off any surplus. Suitable lubricants which
will not stain the fabric are available.
First appeared in the Essex Newsletter with thanks.