MODERN SATNAV IN A 6-VOLT
BOX
My old
satnav worked fine in the Box having wired up its cigarette lighter/USB port to
the 6v battery. But looking forward to our holiday in France with the
club, on checking the old satnav it was clear that its maps were nowhere near up
to date so a ‘new’ secondhand one was purchased from eBay. What became
very clear straightaway was that the new satnav wasn’t having any of the old
electrical arrangement. Clearly, the new cigarette lighter/USB port it
came with needed a 12v source to be able to step down to the standard 5v input.
However, on further research I read that the later satnavs are more sensitive to
their input and could be damaged if not fed an exact 5 volts and talking to club
members revealed that the standard dynamo could deliver anywhere between 6 and 8
volts. Other club websites also warned about trying to wire up a satnav to a 6v
battery. However, I must say that everyone I asked in the club said that
they had had no problems over the years but when I looked at their arrangement
in-car it was clear that they were using old equipment all round. So, to
persevere with an upgrade, this is what I did:-
The
objective was to fit a female USB port in the glove compartment that would
deliver a guaranteed 5v output when wired into the car’s 6v battery and to do
without the cigarette lighter arrangement.
Technically it should have been very simple. However,
I couldn’t find a readymade unit that would do the job but I did find the bits
and pieces needed for a DIY job in good A7 style. The problems only
existed in my lack of electronic skills and needing a more steady hand.
1.
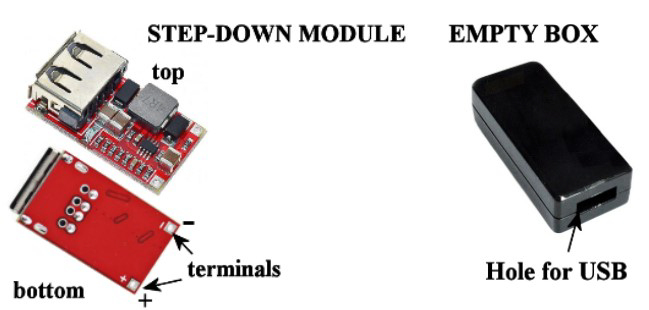
Purchase a step-down Module that takes whatever voltage comes in and gives out a
constant 5v.
1.1.
Amazon: “ZK 5 Pcs 6-24V 24V 12V to 5V 3A USB Step Down Module DC-DC Converter”
x5 for £5.59 +£4.99 delivery. (I’ll explain why I needed 5 later.)
2. Purchase a suitable little
box to put it in.
2.1.
OnBuy.com: 4x “USB Stick Plastic Box Electronics Enclosure USB Flash Drive
Housing Plastic Junction Box”. £8.23 + free delivery. (4 needed for
trial-and-error fitting. See later.)
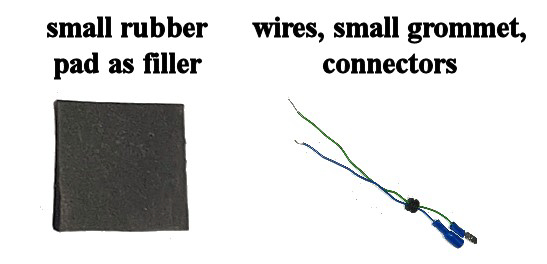
3. Find the right wire for the
job. Needs to be very fine but flexible.
4. Connect up to the battery
or ignition. (I decided to connect it to the battery on the red-switched side.)
I used those blue electrical connectors in the glove compartment in case it
didn’t work but obviously the unit could be wired directly to the
battery/ignition and left in the glove compartment if you’re confident of your
wiring and soldering.
This is
what you get:
This is what you need:
Construction:
Open the box with a small screwdriver and try to fit
the module with the USB port in the rectangle hole. Part of the mouth of
the module should fit over the outside of the aperture in the box and the body
of the module behind the aperture so that the module can’t be pushed in or
pulled out when in use. In my case, the wall of the box was too thick so some
careful sanding and trial-and-error fitting was required until the module slid
down tightly over the mouth in the bottom tray and the top half of the box also
pushed down over the module, snapping shut. (This is where the need for 4 boxes
came in!) The next job is to determine which is the top and bottom as the slot
isn’t central and neither is the body of the module. What you want to
achieve is the module sitting tightly in the slot and with its bottom on the
floor of the tray. Mine was a bit short so that’s where the little square
rubber pad came in for it to sit on. Once the ‘mock-up’ was achieved, I
put a dob of Tippex on the bottom of the tray as a fixed point for the final
assembly.
Having got
the physicals right, all(!) that needs to be done is to wire up the module and
organise the cables. WARNING: Do not try to solder-in the wires. It might
have been my lack of soldering skills but I blew two modules before I realised
what was happening (this is where having 5 modules to play with came in!) So I
twisted the wires tightly into place (this is where flexible wire was needed as,
at first, I used some stiff, single strand wire which was easy to push through
the tiny holes but it kept breaking) and used Araldite to fix them in place
(having determined that Araldite isn’t a conductor). Slide on a suitable grommet
to stop the wires from wobbling the module about in use, cut to length and fit
the connectors or run the wires to the battery/ignition. Now fit the whole
unit together and use superglue to glue the two halves of the box together for
extra rigidity.
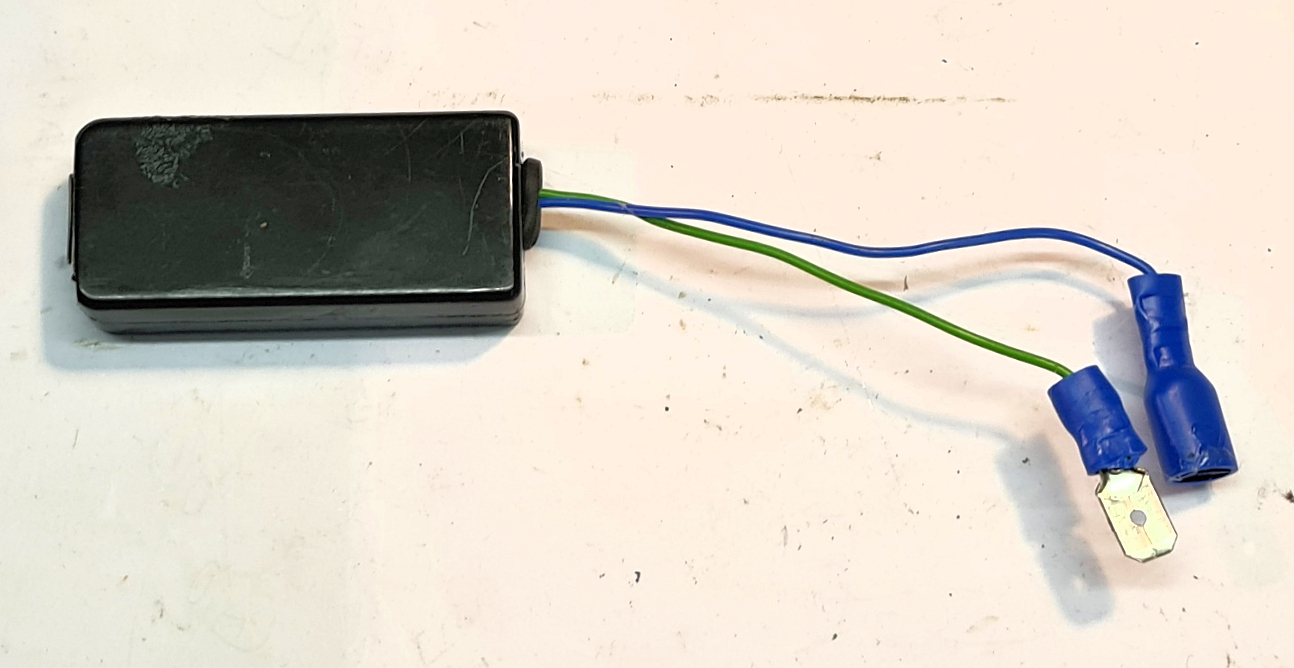
All over France, and subsequently, it has worked
flawlessly and will now be a permanent addition to Frederica. However, I did
take with me a belt-and-braces backup in the form of a modern Power Bank with
20,000 units of power and a multitude of cables and connectors which, I think,
would have done me for the whole week away. I chose the “VRURC Portable Charger
20000mAh with Built in Fast Charging Cables, Power Bank PD 18W” through Amazon
at only £21 + postage.
David Whetton DA7C