 method I have evolved to overcome the problem.

PART 1
Have you ever got
frustrated with clutch springs and toggles flying everywhere when you’re trying
to offer up the clutch assembly to the flywheel after a relining job? If so, you
might be interested in a
method I have evolved to overcome the problem.
¡ Before fitting the new lining to the pressure plate, tap out two diametrically opposite holes in the spring recesses to ¼ BSF. (photo 1.)
¡ In the clutch cover, drill out the corresponding holes to ¼”. (photo 2.)
¡ Obtain two ¼ bsf set screws about 2.5” long and two nuts to use as clamps. (photo 3.)
¡ When
ready to assemble, place the relined pressure plate face down on the clean bench
and place the springs in their recesses. Carefully fit the clutch cover over the
toggles and mate it up with the springs. Having fitted the nuts to the top end
of the set screws, feed them through the enlarged holes in the clutch cover and
screw them gently into the treaded holes in the plate, taking care not to got
too far and damage the lining.
¡ Gradually tighten up the nuts alternately until the springs are completely compressed and you are left with one solid lump which you can now offer up to the flywheel without having to struggle to keep everything in place whilst fitting and tightening the fixing bolts. (photo 4.)
¡ Once the clutch is thus fitted you can remove the clamping bolts and put them in a labelled tin in the Austin Seven tools drawer in case you ever need them again.
To avoid removing the nicely fitted flywheel from its taper on the crankshaft I have relined the centre plate instead. This has worked very well on both my 1926 Chummy and my 1923 Austin 12/4.
JOHN DUNN (BA7C)
With many thanks—Ed.
UPDATED ARTICLE - PART 2
This is a modification to the clutch to make
assembly and dismant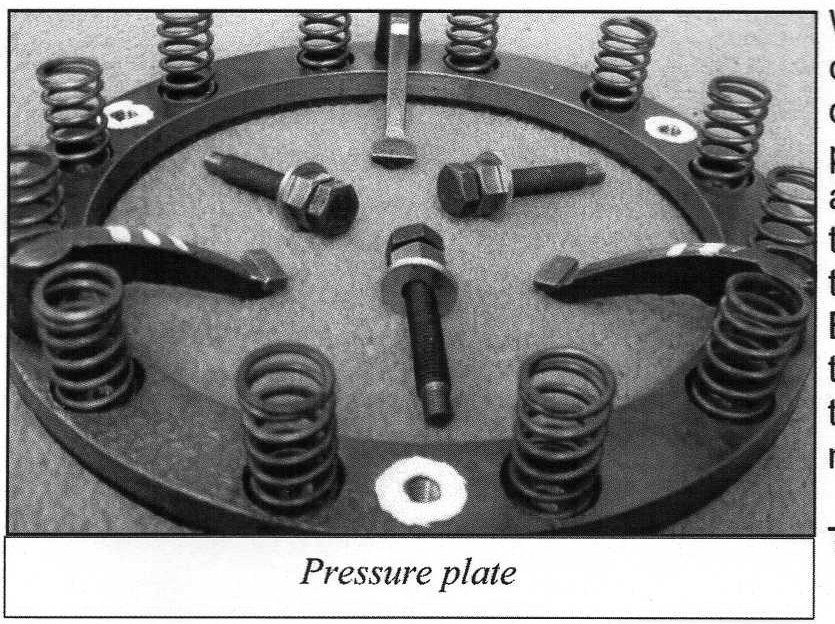 ling
of the clutch cover/ pressure plate much easier and fitting the mousetrap
springs stress free. The objective is to hold the cover/pressure plate assembly
together whilst dismantling the clutch without straining the mousetrap springs
on a 4-speed clutch or springs flying apart on a 3 speed. You can carry out this
modification when relining the clutch or any time you have access to the clutch.
ling
of the clutch cover/ pressure plate much easier and fitting the mousetrap
springs stress free. The objective is to hold the cover/pressure plate assembly
together whilst dismantling the clutch without straining the mousetrap springs
on a 4-speed clutch or springs flying apart on a 3 speed. You can carry out this
modification when relining the clutch or any time you have access to the clutch.
When the clutch cover and pressure plate are
dismantled, drill three equidistant holes 5.5mm diameter in the clutch pressure
plate, then place the pressure plate onto the cover plate and mark these hole
centres on the inside of the cover plate. Drill three pilot holes through the
clutch cover. Tap the 5.5mm holes 1/4 BSF, drill out the pilot holes in the
cover plate to 9mm. These are clearance holes for the three spring compression
bolts we are about to make.
Take three 5/16 x 2" BSF set bolts, reduce the ends to
1/4" diameter for 3/8 of an inch and thread 1/4 BSF. This gives you a shoulder
to lock the bolts into the
 pressure
plate. Fit a 5/16 BSF nut and plain washer to the bolt and run the nut up to the
bolt head — the washer needs to be fairly thick so that it does not distort.
pressure
plate. Fit a 5/16 BSF nut and plain washer to the bolt and run the nut up to the
bolt head — the washer needs to be fairly thick so that it does not distort.
To assemble pressure plate and cover, place pressure
plate flat on the bench, fit clutch springs in the plate, stand clutch levers
vertical and drop cover over levers onto springs. Check all springs are properly
located. Fit your three compression bolts through the cover and screw into
pressure plate tight. Screw down the three nuts evenly to compress the springs-
tighten down until fully compressed. This drops the levers and makes it easier
to fit the mousetrap springs. The whole assembly can now be fitted to the
flywheel. Once bolted up the compression nuts can be released gradually and the
clutch plate centred. Do not forget to remove the bolts.

Terry Griffin (BA7C)